This battle is based on the 'The Weak Flank' scenario from 'Programmed Wargame Scenarios' by C.S Grant.
The battle is set in 1809. The French have deployed in a defensive position on a ridge facing a threat from the Southeast. They have only thin protection on their right flank, to the West, and expect the Austrian attack to be frontal. However, the Austrians moved up on the previous evening and has a small screening force to the Southeast. During the night the Austrian main force has moved round to the West and are prepared to launch an attack on the French weak flank. The Austrians also have a 25% superiority in numbers.
I am playing both sides as the programmed opponent and using my own Vom Kriege rules. The character of each commander is important in this scenario and each is rolled for. The French overall commander is cautious with a right flank infantry Division (deliberate), a left flank infantry Division (cautious), a right flank heavy cavalry Division (deliberate), a left flank light cavalry Division (deliberate), and a flank Division (bold). The Austrian overall commander is bold, a left flank infantry Division (cautious), a right flank infantry Division (deliberate), a reserve Grenadier Division (cautious), a left flank cavalry Division (deliberate) and a right flank cavalry Division (cautious). Cautious commanders take 2 turns to react to orders, deliberate commanders take 1 turn. A bold commander will react immediately to orders and events.
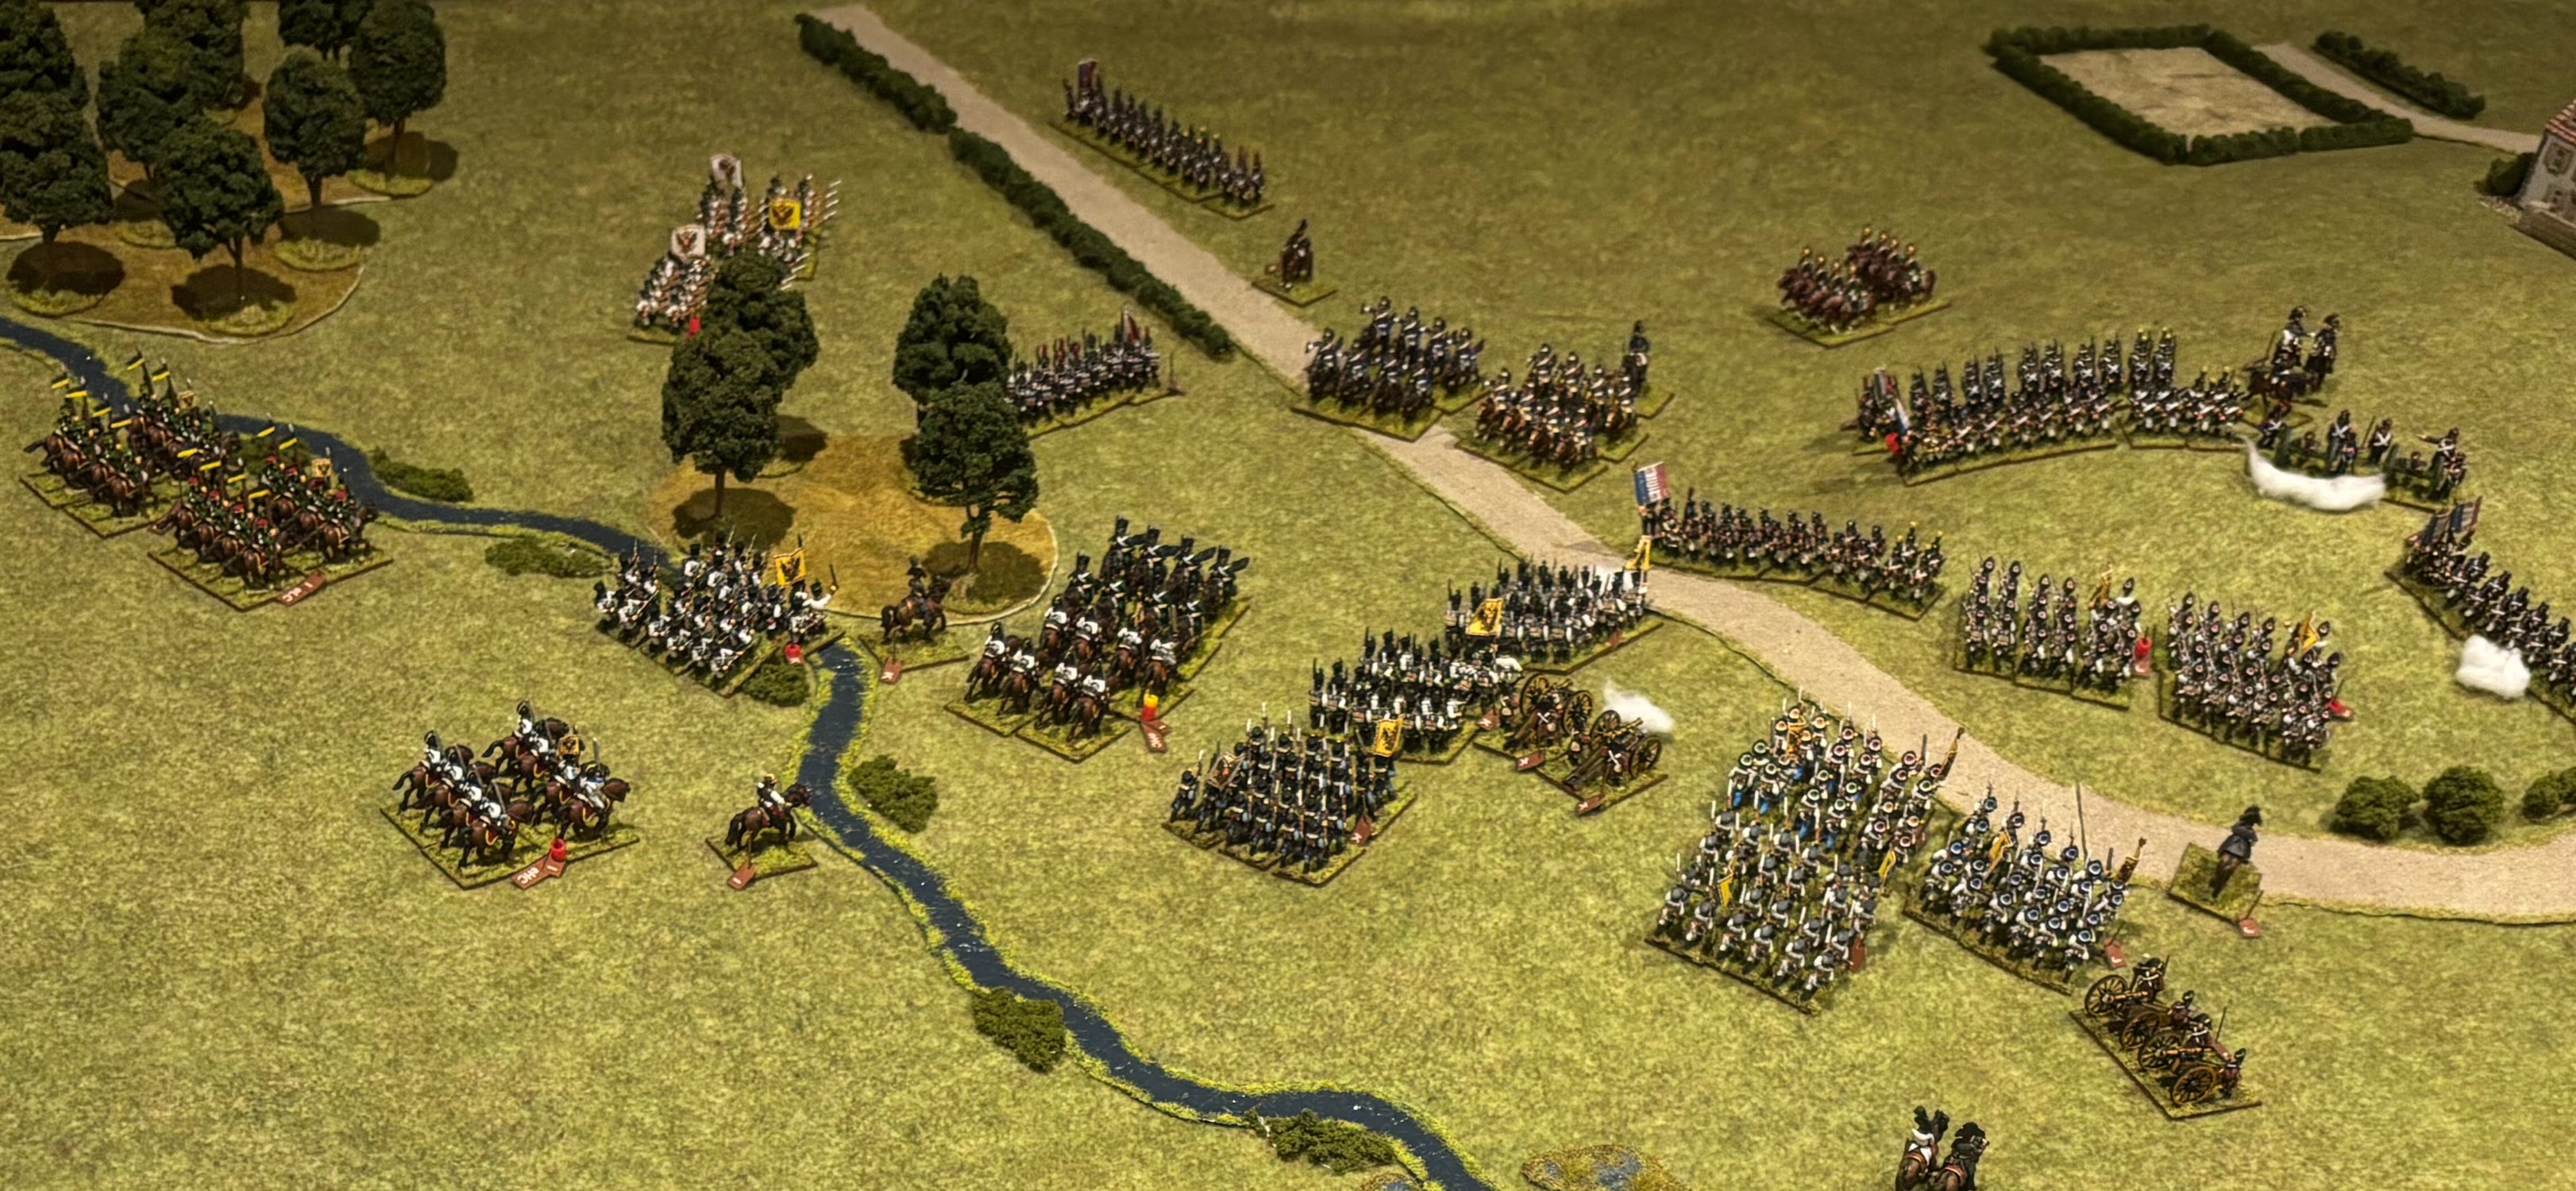
The French objective is to hold the ridgeline while the Austrian objective is to take the ridgeline. All the forces are on the table as shown below.
The French roll for 35% left, 20% centre, 35% right and 10% flank guard. 15% of forces are held back from the front line.
The Austrians roll for position 2 and Plan C, i.e. forces divided so that left hand will move down the axis of the ridge and the right hand will move along the front of the ridge pressing well forward to pin the enemy front and the left half can roll up the French on the ridge.
Turn 1
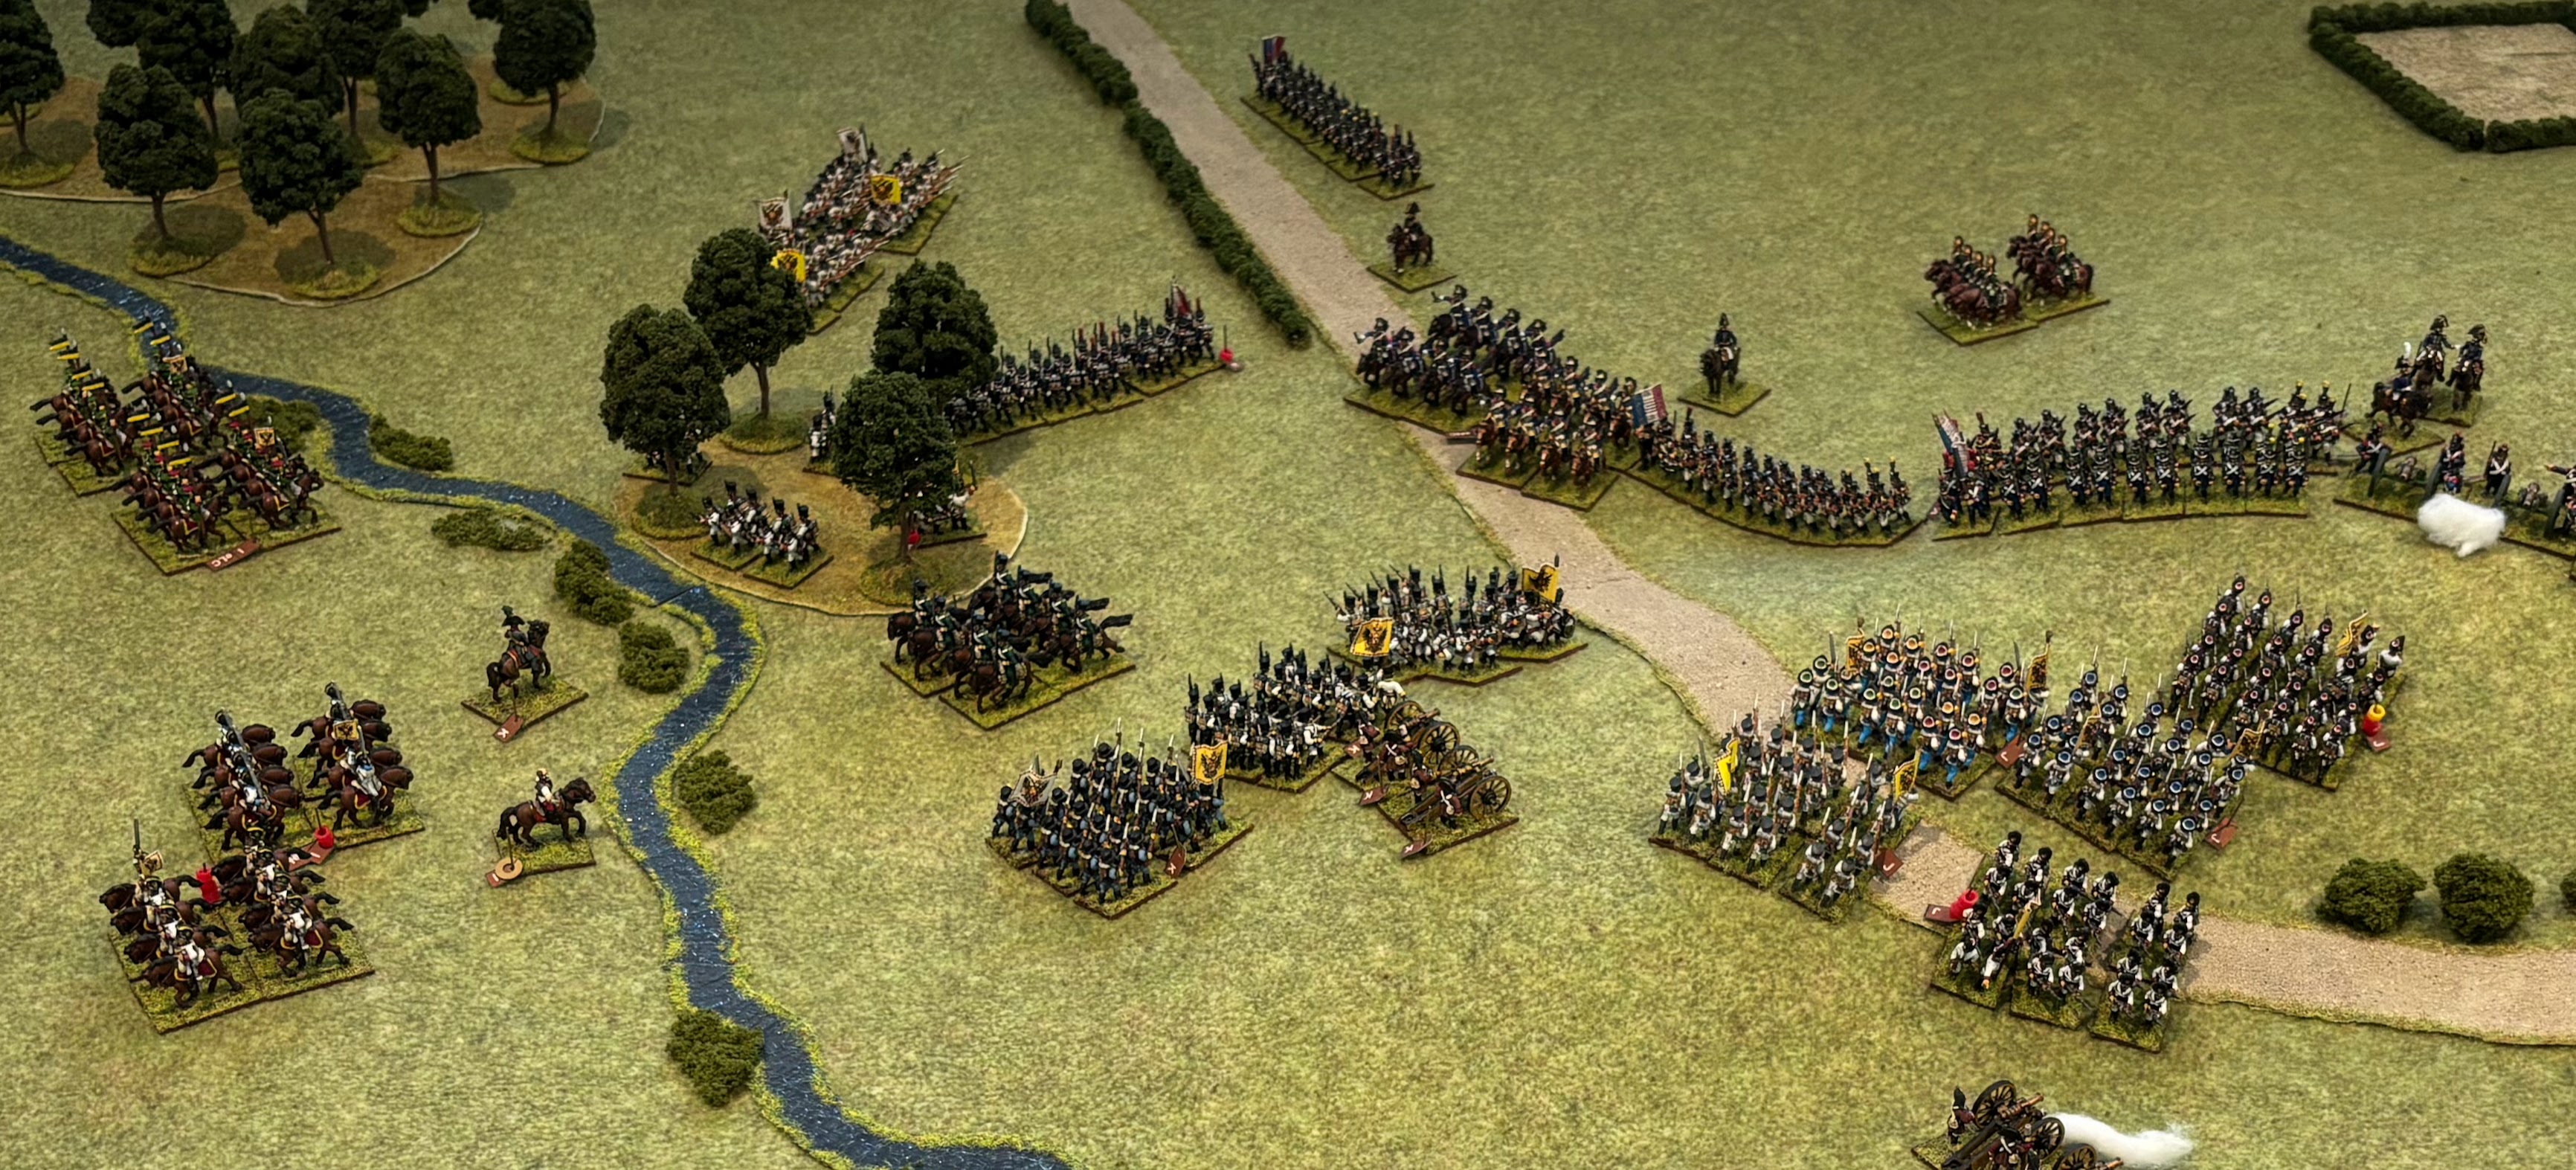
The Austrians start their attack with the right flank divisions moving along the front of the ridge to pin the French in place while the left flanks moves to cross the stream and attack the French right flank.
The French flank guard scores hits on the left flank cavalry and infantry as they pass the woods. The Austrian response will be to bypass the flank guard and deal with them using the trailing brigade.
The French commander has spotted the Austrians on his right flank but as a deliberate commander he will take until next turn to initiate any change in orders.
Turn 2
A brigade from the Austrian left flank moves up to the stream to engage the French flank guard (top left). Both sides score a hit. The remainder of the division moves forward.
The Austrian left flank cavalry fails to activate any units this turn and continues to take fire from the woods.
The Austrian right flank surges ahead to the front of the ridge. The right-most French unit on the ridge reacts to the flanking threat by changing its facing. The French commander has now issued new orders to form a defensive line well forward on the right flank of the ridge. These orders wont take effect until after the French commander's initiative.
Turn 3
The French commander's new orders haven't arrived yet!
The French flank guard retires from the Austrian brigade after receiving heavy musket fire (top left). Austrian heavy cavalry advances over the stream besides the woods ready to take the French right in the flank.
The Austrian right flank surges ahead to try and pin the French line before they can react to the flank attack.
Turn 4
The French flank guard infantry routs and is then rallied in the face of overwhelming musket fire (top left).
A series of cavalry melees takes place between the woods and the ridge (top-middle). Both sides suffer hits and the final outcome is still up in the air. The Austrian infantry start to pour over the stream as the French infantry form a thin line on the ridge to meet them.
New orders have arrived and the French left flank swings around to meet the Austrian threat moving across the front of the ridge. Devastating artillery fire from atop the ridge causes many hits on the trailing Austrian brigade, while French infantry poor whithering musket fire into the left-most unit of the leading infantry brigade.
Turn 5
The Austrian brigade on the left flank continues to push the French back but the French cavalry appear to have thwarted the Austrian heavy cavalry crossing the stream. However, a mass of Austrian infantry columns, including the reserve Grenadiers, is now ascending the ridge with significant artillery support.
On the French left flank, Austrian heavy cavalry swing wide to meet the French cavalry.
French artillery and musket fire from the ridge routs two Austrian infantry units.
Turn 6
The French flank guard pulls back from the woods and just manages to hold the Austrian brigade which threatened to break into the French rear (top left). The cavalry melee continues between the woods and the ridge.
The Austrian grenadiers make a breakthrough on the ridge routing a French unit (right).
On the French left flank a series of cavalry charges has been inconclusive for both sides.
Two Austrian units have routed (lower-left) but have been rallied.
Overall the battle is still too close to call. The breakthrough in the centre by the Austrian grenadiers does threaten to unravel the French position if the Austrians can follow up next turn.
Turn 7
The French chasseurs see off the Austrian dragoons back across the stream. French cuirassiers charge the leading infantry unit heading up the ridge forcing it to form square and the cuirassiers retire unsuccessfully.
An Austrian grenadier unit routs as it makes contact with the French infantry at the top of the ridge. The second grenadier unit takes several hits as the French stand firm.
The cavalry melee on the Austrian right flank continues with a French dragoon unit routing off the table and both sides with heavy casualties.
The French have formed a strong defensive line on the ridge and the Austrians have pulled back to rally.
Turn 8
The Austrians finally get their lancers moving to sweep around the French right flank (top left).
The Austrian assault on the ridge proves to be a bloody exercise for both sides with a second grenadier unit routing. The French cavalry retires to support the right flank.
The Austrian and French cavalry have fought themselves to a standstill, but the Austrian hussars are now on the way (lower-left).
The Austrian infantry continue to rally their brigades to prepare for another assault.
Turn 9
The Austrian attacks in the centre have faltered with 2 grenadier units routing off the table. An Austrian brigade of lancers is sweeping around the right side of the French flank (top-left) and more Austrian light cavalry has arrive on the opposit flank (bottom-right). Otherwise the French are holding firm on the ridge.
Turn 10
Both sides consolidate by rallying units near breaking point. The Austrians have pulled back from the ridge to reform their troops for what is likely to be a final assault.
Turn 11
View from behind the French lines. The French and Austrian cavalry melee on the right flank with honours shared although one lancer unit has routed.
The Austrian Grenadier Division has broken leaving a big gap in the Austrian centre.
On the French left flank the Austrians have charged up the ridge but heavy musket fire stalls the assault.
The Austrian cavalry move around the flank under artillery fire as the weakened French cavalry wait patiently.
Turn 12
The Austrian cavalry have stalled in their advance around the French left flank, suffering disorders from the French artillery on the ridge.
The Frenchinfantry move their lines down to pepper the Austrian columns with musket fire, and they have plenty of reserves ready to take advantage of the situation.
On the French right flank, the French dragoons and infantry see off the Austrian lancers who are now routing off the table (top-right).
A last-ditched charge by Austrian infantry in the centre fails under heavy musket fire.
It doesn't look like the Austrians have the numbers to make a successful attack any more, especially with the French flank now secured.
Turn 13
In a surprise assault, the French lancers rout a unit of disordered hussars then breakthrough charge the Austrian cuirassiers routing them also!
In the background, the French have pushed the Austrians back and their attack is faltering.
A final assault by the Austrians sees some success as an infantry brigade pushes a French unit back from the ridgeline. But with few troops to exploit the gap its likely to be a short-lived success.
Turn 14
The whole Austrian centre and right wing has departed the field and the Austrian left wing pulls back as the French take the battlefield. A resounding victory for the French!


Comments
Post a Comment