Broken Ground (Age of Eagles AAR)
Battle report for another Programmed Wargame Scenarios battle using the Broken Ground scenario and modified Age of Eagles rules.
The map is made up of the following rolled sections.
The period is 1813/14 with the Austrians (Red) attacking the French (Blue). Both sides have Columnar infantry apart from French Elite infantry which are Impulse.
Austrian forces are from list 27:
1st Corps
1st Division
1st Brigade (4 infantry 6/5/3 - columnar)
2nd Brigade (3 infantry 6/5/3 - columnar)
1st Brigade (4 infantry 6/5/3 - columnar)
2nd Brigade (3 infantry 6/5/3 - columnar)
3rd Brigade (3 infantry 6/5/3 - columnar)
Cavalry Brigade (2 Hussar E4/3/2)
Artillery (4 Light)
Artillery (4 Light)
Reserve Brigade (4 Grenadier E6/4/2 Sk - columnar, Artillery (2 Light))
Cavalry Division
1st Brigade (2 Cuirassier E4/3/2)
2nd Brigade (2 Dragoon E4/3/2)
2nd Brigade (2 Dragoon E4/3/2)
French forces are from list 12:
1st Corps
1st Division
1st Brigade (3 Infantry 6/5/3 Sk - columnar)
2nd Brigade (2 Infantry 6/5/3 Sk - columnar)
3rd Brigade (2 Infantry 6/5/3 Sk - columnar)
Artillery (1 Heavy, 3 Light)
Reserve Brigade (3 Guard E6/4/2 Sk - impulse)
Cavalry Division
1st Brigade (2 Cuirassier E4/3/2)
2nd Brigade (2 Hussar E4/3/2)
The French must hold the broken ground to the north of the table while the Austrians must seize the borken ground opening the roads to the north.
Game Setup
The French deploy 30% in the centre and 35% on each flank. 15% are maintained as a reserve.
Right flank: 1st Brigade Infantry, Hussar Brigade, 2 Light batteries
Centre: 2nd Brigade Infantry, 1 Heavy battery
Left flank: 3rd Brigade Infantry, Cuirassier Brigade, 1 Light battery
Reserve (centre): Guard Brigade
The Austrians fail to reconnoitre prior to entering by march column along the road from the south.
Turn 1
The French win the initiative but pass to the Austrians. The Austrian 1st Brigade enters in march column along the road.Turn 2
The Austrian 1st Brigade deploys after spotting the French defensive line confronting them. The 2nd Brigade enters behind them.Turn 3
The Austrians now issue their orders, a feint attack to the French right flank before an attack in the centre. The subsequent French orders are to hold the entire front.
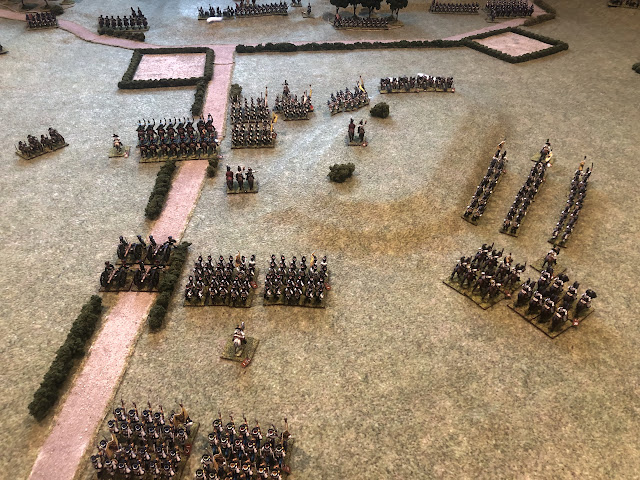
The Austrians deploy their artillery ready for the left flank feint attack on the hill. The French artillery returns fire and one of the Austrian guns is silenced. An Austrian dragoon regiment skirts to the far left as the 3 infantry units form attack columns.
The Austrians deploy their artillery ready for the left flank feint attack on the hill. The French artillery returns fire and one of the Austrian guns is silenced. An Austrian dragoon regiment skirts to the far left as the 3 infantry units form attack columns.
The 2nd Brigade moves up onto the hill with their artillery to deploy for the main attack in the centre.
The 3rd Austrian Brigade enters this turn and sets off in march column for the right flank. The Austrians still have a cuirassier Brigade and the Grenadier Reserve to arrive along the road.
Turn 4
The Austrian left slowly brings its attack to bear as the build up in the centre continues. Reserves continue to feed in along the road.The French artillery pepper the Austrians at long range and luckily score a hit and a disorder.
Turn 5
The Austrians continue to advance their feint attack against the French right flank as they move up their infantry and artillery.The reserve grenadiers move up to support the main attack as an infantry Brigade and the cuirassiers move around the right of the hill.
Turn 6
The Austrians pull back on the left flank in the face of heavy artillery fire with one unit already worn.But the Austrian artillery silence one of the French batteries.
Turn 7
On the French left flank the Austrian dragoon win a melee against the French hussars as the French and Austrian artillery trade shots scoring hits and silencing batteries on each side. The Austrians have pulled their infantry back as the main attack commences in the centre.Turn 8
The respective cavalry regiments on the far left French flank both rally after their initial melee.To the right of the woods the Austrian hussars score a decisive win against their French counterparts and then breakthrough charge against an infantry regiment sending it retreating into the woods. The French defense of the hill realigns to this new cavalry threat.
Turn 9
The Austrian dragoons clean up the French hussars then breakthrough charge into the French infantry and artillery sending them scattering. The French form square and tighten their line with cavalry threats on two flanks.Turn 10
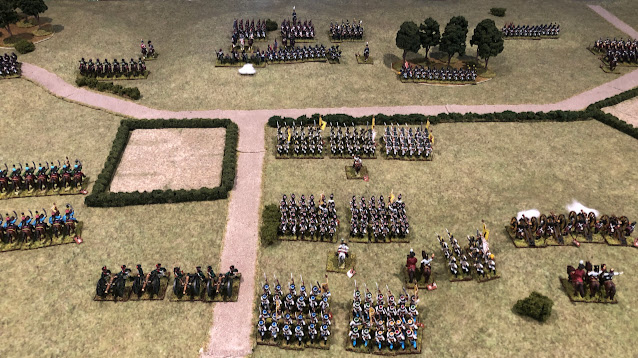
From the French side on their right flank, the French are holding the Austrians at bay.Turn 11
On the Austrian left flank the Austrian dragoons wipe out the French hussars and then breakthrough charge into the French square resulting in them retreating back. The Austrian hussars (middle-left of photo) are now worn from repeated hits from the French artillery.Turn 12
On the Austrian left flank the Austrians advance up onto the hill. The Austrian dragoons have swept around behind the French position (top left).Turn 13
On the Austrian left flank the Austrian dragoons obliterate the French infantry and gunsfrom the rear as the Austrian artillery hit them from the front. There is a lone French square which surrenders meekly.It's all over for the French as the Austrians win a major victory. There is no doubt that repeatedly good melee dice rolls helped the Austrians and the weight of numbers told in the centre. The regimental version of Age of Eagles rules also worked very well.


Comments
Post a Comment