Posts

Durenstein 1805 AAR

Image
After-action-report for the Durenstein 1805 scenario . At Dürenstein a combined force of Russian and Austrian troops trapped a French division commanded by Théodore Maxime Gazan. The French division was part of the newly created VIII Corps, the so-called Corps Mortier, under command of Édouard Mortier. In pursuing the Austrian retreat from Bavaria, Mortier had over-extended his three divisions along the north bank of the Danube. Mikhail Kutuzov, commander of the Coalition force, enticed Mortier to send Gazan's division into a trap and French troops were caught in a valley between two Russian columns.

Folding Wargame Table with Storage

Image
I embarked on a project to build a folding wargame table that can also store all my miniatures and wargame scenery. The project was inspired by seeing the IKEA Norden Gateleg folding table. However, I needed mine to be much bigger. The table size is 2250 mm x 1500 mm at a height of 1 metre (I'm 6'5"). I used pine with some hardwood for the drawer runners. To keep the build as easy as possible, all joins are screwed and all timber cuts have been done using a table saw.

Wargame Mat (Version 5)

Image
Following the failure of Wargame Mat version 4, I ordered another fleece mat from an on-line fabric printer . I used a slightly greener base colour and a very feint 70 mm hex grid on a sheet of fleece 2400 x 1500 mm.

Painting Austrians - Experiments

Image
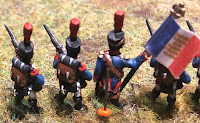
After finishing around 120 Austrian infantry figures, I'm now working on some Hungarian units. I'm testing out some alternative painting techniques for this batch as illustrated below.

Terrain Mat using Fleece and Static Grass

Image
The Problem I've been pleased with the fleece wargame mat that I had got printed with a subtle 60 mm hex grid. However, given the standard width of my units is 60mm, this doesn't leave much wriggle room to place units. I've now updated the rules to use a 70mm grid which is the same as I have used for the EVA hex modules. I wasn't entirely happy with the look of the EVA hexes so I was looking to update my fleece mat to 70mm hexes.

Painting Austrians - Part 1

Image
I've just purchased a whole lot of Warrior Miniatures 15mm Napoleonic Austrians. Now for the task of painting them all. I've experimented a lot with the white uniform and settled on the following method:

Command Identifiers and Hit Markers

Image
The new command identifiers and hit markers have been used in the latest AAR for the Battle of Brienne 1814 . The photo below shows the use of coloured beads to identify 2 cavalry commands (yellow and orange). The red beads are hit markers. The brass washers are bonus command points allocated from a higher order leader.

Brienne 1814 AAR

Image
In early January 1814, Napoleon's weakened forces lost the Rhine barrier and over a quarter of one million allied soldiers began their advance to French soil. After a series of defeats under his blundering marshals, Napoleon decided to take personal command of the remaining French divisions defending Paris--barely 60,000 men. Reinvigorated with his old energy and fire, the Emperor sought to place his army in between the advancing allies, defeating each allied sovereign in detail before they could unite.

Command Identifiers

Image
I've now added the coloured beads to the command identifier tiles. This means that commands can be identified by either a letter or a bead colour.

Command Identifiers

Image
I have replaced the magnetic markers used to identifier units in the same command with coloured beads. The beads are placed on the same pin that hit markers are placed on.

Learnings from the Friedland Scenario

Image
The journey to discover the perfect set of rules and modular terrain setup continued with the Friedland scenario . Having reverted back to the terrain cloth over the 3D modular EVA foam boards, I'm really happy with the change. The hex grid on the cloth is not visible to the untried eye, but is adequate to enable units to be properly located and moved on the table. The game identified a few more tweaks to the rules as situations arose that had not been encountered in previous games. 1. One of the commands broke after 3 of its' units routed off the table. Potentially, the leader could have rolled a flag to remove a hit from himself, and stopped the route of the whole command. This wouldn't have been in the complete spirit of the intention of the rule. An adjustment to the rules has now been made so that hits incurred as a result of unit losses can't be removed. 2. The number of command points per leader doesn't feel right. I've now simplified this so that ...

Hex Terrain Boards - Part 3

Image
After years of trying various tabletop terrain options, I finally think I've landed on the best blend of flexibility and looks. The setup uses EVA foam mats as the base for forming hills and rivers, with a printed fleece cloth laid over the top.

Friedland 1807 AAR

Image
After the battle of Heilsberg, Bennigsen had crossed the Alle River and was retreating towards Allenburg with most of the army on the right bank. Bennigsen was under pressure to demonstrate an aggressive move and would keep his detractors at bay. The Russian army was exhausted and low on morale. Napoleon on the other hand was elated. He was receiving news that the Russians were crossing over to his side of the Alle. An opponent does not often execute such difficult movement in the face of enemy, to fight with an impassable river at his back. Napoleon's only fear was that Bennigsen would recognise his error and retrace his steps before he could strike in force.

Magnetic Command Markers

Image
I've updated the command chit and unit markers to make them less obvious on the tabletop and more reusable across different battles. Firstly, each command is now identified by a letter (A-Z). The command chit is represented by a scrabble tile with a sticker on it as shown in the photo below. Each unit within the command has a magnetic marker (green) with the command letter on it. The command leader also has a magnetic marker (brown) representing its command value. The magnetic markers were made from magnetic sheet with a printed label stuck on top and the markers cut out with a cutting blade. Each command stand has a small length of metal (part of a staple actually) which is glued to the base. It's not very obvious but is enough to ensure the magnetic markers don't slide off the stand when it is moved.

Polotsk 1812 AAR

Image
As Napoleon directed the main advance toward Moscow, Marshal Oudinot's II Corps protected the northern flank. Only General Wittgenstein's Russian I Corps blocked the French from marching all the way to St. Petersburg. Impatient with Oudinot's timidity, Napoleon dispatched St.-Cyr's weak Bavarian corps to bolster the French effort to defeat Wittgenstein.  By the morning of August 17, 1812, Oudinot's 20,000 French and St.-Cyr's 12,000 Bavarians lingered at Polotsk. A rural town along the Dvna River, Polotsk represented a crucial road junction in northern Russia. Believing the Russians too weak to bother him, Oudinot had carelessly deployed his force on both banks of the Dvna River, spread out and vulnerable to attack. Wittgenstein recognized this weakness, and hoped to maul St.-Cyr's Bavarians on the northern bank of the Dvna. Skirmishing broke out around 8:00am while Wittgenstein deployed. French Aim:  To hold the approaches to Polotsk. Russian Aim: Capture S...

Learnings from the Polotsk Scenario

Image
The latest Polotsk scenario delivered a few more learnings in relation to the rules. The command rules again proved their robustness in provding a realistic representation of napoleonic battles. However, a couple of refinements were made to the rules. An open order formation was introduced for units in towns and difficult terrain. This seems more realistic than assuming units were unformed. Units in towns are now always in open order which makes placement of stands easier and better models the way combat works in built-up areas. The biggest change was to remove the reduction of a units battle die by the number of hits it has taken. This is a big change but it also reverts back to the C&C origins of the system. While reducing a units battle dice by the hits it has taken appeared to be a realistic approach, it resulted in some rather odd situations where units had no battle dice to roll where it would be assumed that they would. The new rule means that encounters play out fa...

Hex Terrain Boards - Part 2

Image
I've now all but completed the 27 terrain boards. Here is the plain EVA foam board showing the angle cut. This reduces any gap between boards when they are placed together.

Hex Terrain Boards - Part 1

Image
Just started a new project, building on my experience with EVA foam mats. My intention is to create a modular terrain system that supports a 70 mm hexagon grid and both the grid and the edges between boards are not immediately noticable. The first step is to define the modular pieces and the various terrain configurations on each. I've ended up with about 20 boards, each around 50 cm x 50 cm, that would provide a 4 x 3 game board (12 tiles) covering 2.0 m x 1.4 m. Each board is hexagonal in shape with 7 hexagons from edge to edge. The hexagonal boards can be rotated to give 3 different orientations. I've started a test hexagon tile. I've finally decided that grey is the best base colour. I've used green previously but the grey gives a way more realistic look. This test tile has a river and various static grass applications. I've still to decided on how to mark the hexagons on the tile in a suitably subtle way. I think I will just mark the centre of each hex by ...

Klyastitsy 1812 AAR

Image
Date: 1 August 1812 Combatants: Russia v France Background By late July 1812, Napoleon’s main army closed in on Smolensk, and his northern flank was protected by Oudinot’s II Corps. Since the start of the campaign, Oudinot had faced little opposition from his opponent, General Wittgenstein. Thus, it was a great surprise to the French in the last days of July when the Russians finally appeared ready to fight. On July 28, French and Russian cavalry clashed near the village of Jakubovo, and a heavy infantry skirmish unfolded in the subsequent days. Despite Russian pressure, the French still held the village. By the night of July 31, Wittgenstein concentrated his entire corps in front of the Jakubovo plateau, ready to attack at dawn. Russian Aim: Hold Jakubovo and halt the French advance.  French Aim: Clear the road to St Petersburg by destroying the Russian force. Jakubovo, the road at A, and the bridge at Klyastitsy are major objectives. Game Length: 7.00 am to 5.00 pm, 20 turns Scal...

Bridges

Image
Scratch-built a few bridges. The first were a set of 3 stone bridges made from balsa wood. The stones were etched into the balsa using a pen. The second type of bridge was a timber bridge made from match sticks.

Wargame Mat

Image
Ordered a fleece cloth from an on-line digital fabric printing company . I created a repeating 30cm x 30cm repeating design and just submitted it on-line. The picture below shows the end result. I was after a mottled olive-green with a very subtle hex grid.

Total Battle Miniature Buildings

Image
Purchased a number of the Total Battle Miniature 10mm scale buildings and painted them up exactly as per the included instructions. They came up even better than I thought they would. They also fit perfectly in the 60mm hexes.

Sand Roads

Image
After many attempts at representing dirt and gravel Napoleonic roads on the tabletop, I've decided that pouring sand onto the mat is the most flexible and realistic approach. I used some Woodlands Scenic Fine Buff ballast in a recent game, and was able to recover more than half of it after the game. It also requires less sand than I thought and the roads look more realistic if you use less. The pics below show how this approach looks.

Pitched Battle AAR

Image
Tried out the ‘Pitched Battle’ scenario from Vom Kriege. The first step was to define the terrain which included a random stream, 2 towns, two hills, several woods, a marsh and some roads. The next step involved rolling for units. The result of the rolls for the French and Russians are given in the tables below.

Terrain Boards

Image
I discovered that a number of fellow wargamers were using EVA foam boards as the base for their wargame terrain boards. These foam boards are normaly used for exercise mats and are 60cm x 60cm square x 10mm thick. They are flexible and join together with interlocking teeth, making them ideal as the base for a modular terrain system.

Russian Army

Image
Current state of figures is in this  spreadsheet My objective is to have 1 corps of 2 divisions per side at 10,000 troops per division.

French Army

Image
Current state of figures is in this spreadsheet My objective is to have 1 corps of 2 divisions per side at 10,000 troops per division.

Modelling Command

Image
A key aspect of these rules were inspired by the writings of Clausewitz, in particular his descriptions of the effect of friction in war. This concept of friction is a major foundation of these rules and the main reason I have used the title ‘Vom Kriege’ for the rules.

Alternate Command Moves

Image
After a number of test games with the rule system, it has become clear that the alternate command initiative mechanism works better than I had expected for solo wargames. Effectively this mechanism allows each side to activate a group of units, usually a brigade, and conduct any actions allowed by the roll of command dice. This often results in an action/reaction sequence throughout a turn, which could not be foreseen at the start of the turn. In addition, the limitations of command dice add to the uncertainty.

Hit Markers

Image
After the first test run of the rules, it was clear that a better system of recording hits on units was needed. The use of markers beside units worked ok but ther is always a danger of the markers getting separated from the unit. I came up with a rather neat solution after spotting a pack of small red beads in a Spotlight Store. There are about 100 beads in a pack for $3. Next I bought a pack of brass pins. The pins were then pushed through the styrene base of a stand and then the pin cut to the right length with tin snips. The end result can be seen in the photos below. The first photo has stands with 3 hits, 1 hit and 0 hits. One stand is on it's side so you can see the head of the pin in the base. It forms a very sturdy and relatively unseen post for the beads to be slid on and off. The pins will be painted brown so they blend in even more.

Command Cards and Markers

Image
Command is an important aspect of these rules. The latest version of the rules has incorporated some new features. The first is the use of Command Cards which are shuffled at the start of each turn and are used to define the order of initiative for the Leaders present on the battlefield.

Maloyaroslavets 1812 AAR

Image
On October 22, 1812, Russian General Kutuzov belatedly learned that Napoleon’s Grande Armee had already abandoned Moscow. The French were marching south to Kaluga. Retreating on a southwestern route would allow the 100,000 survivors of the Grande Armee to find warmer weather and a land not yet ravaged by the brutal 1812 campaign. Hoping to cut off the French columns and force them to turn west instead of south, Kutuzov ordered 13,000 men under Dokhturov to stop the enemy from crossing the Lutza River on the road to Kaluga. After an all-night forced march, Dokhturov’s corps arrived at the village of Maloyarslavets at dawn on October 24. They drove a small French vanguard from the town but could not dislodge the French from their precarious bridgehead on the river bank. At 10:00am, Prince Eugene’s IV Corps began to arrive in force with the intention of recapturing the strategic town. French Aim:  Expand the bridgehead by securing the heights of Maloyaroslavets. Russian Aim: Hold the ...

Amstetten 1806 AAR

Image
Here is the setup with the Austro-Russian forces under Bagration lined up in front of Amstetten and Murat's French advancing out of the forest. The Austro-Russians are outnumbered in infantry but the French have to do all the work in this scenario to take Amstetten by turn 12.

Vyazma 1812 AAR

Image
This is the long version of the AAR and includes over 140 photos! I will be creating a summarised version soon. This was an early testing of my rules so I've taken photos step by step in much of it to record the details of movement and combat.

Golymin 1806 AAR

Image
Setup Initial setup from the French side, with the lead Division of the French I Cavalry Corps nearest. Russian hussars await them in front of the woods. Russian artillery and infantry form a defensive arc in the main approach to the town of Golymin in the far background.

Bridge Demolition AAR

Image
Setup Overall initial setup with French guarding town at bottom of picture, and Russian cossacks approaching in skirmish formation from north and east.